Date: |
30/10/2017 | Subject: |
iOS 11 Network Set up. |
A video version of this process can also be found on our YouTube Channel, tap HERE to access it
Before you continue check which version of iOS is on your iPad as this process differs for each operating system
This guide is for iOS 11 onwards only, if you are on iOS 9 or iOS 10 then search for the correct guide by typing 'iPad connect' in the search field above and choose the correct guide
To check your iOS version simply tap 'Settings', 'General', 'About' and look for 'Version' about half way down in the right hand pane
A brief complete with screenshots explaining how to do this can be found by typing any of these keywords in the search field above 'Which version of iOS is my iPad on' or by tapping HERE
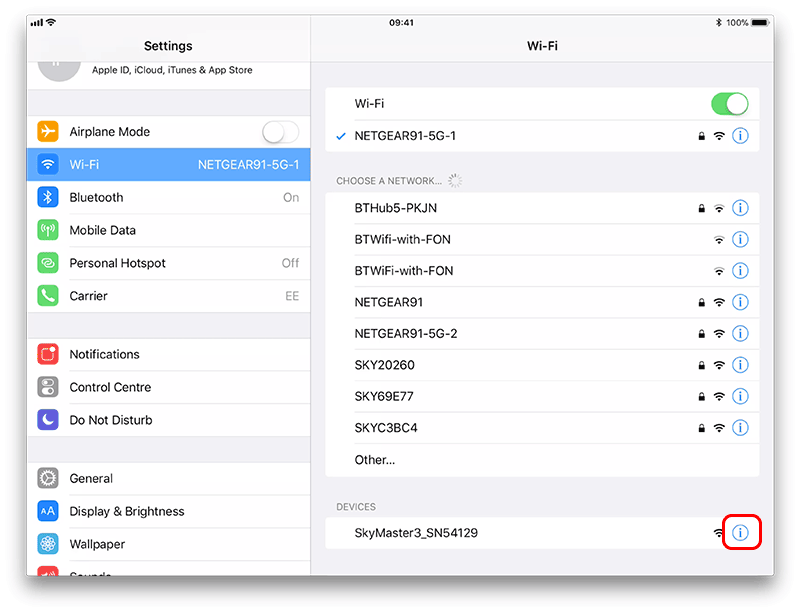
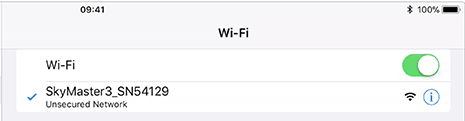
In IoS 11 and onwards some of the menu options and screen layout in the iPad settings use to set up a static IP connection have been re-designed, this page will show you the new pages and explain what you need to now do to create the essential connection between your SkyMaster meter and your iPad. The initial 'Wi-Fi' page has not changed:
At the bottom of the right hand column under devices you can see the Wi-Fi network of a SkyMaster meter being shown: SkyMaster3_SN54129. Tap on the blue information icon highlighted by the red box in the above image to open the network settings page.
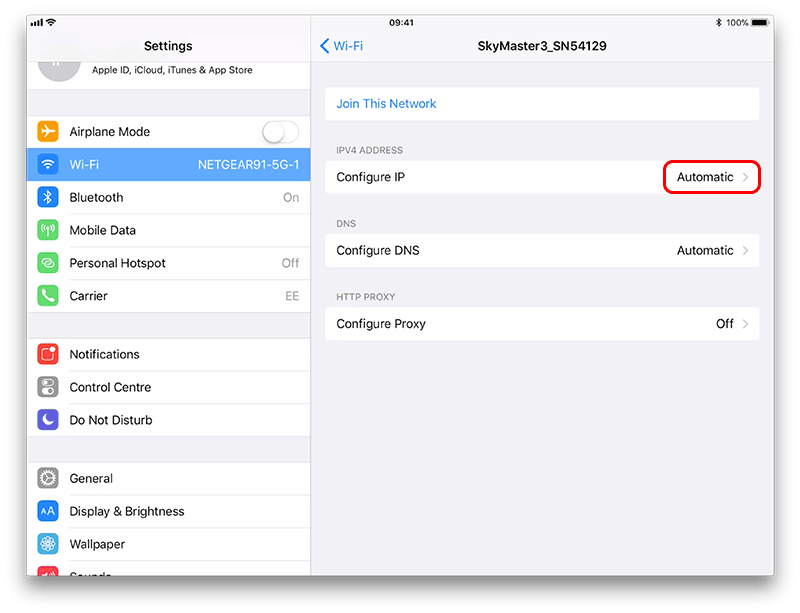
Tap on 'Automatic' as highlighted by the red box in the above image to open the following IPv4 configuration page.
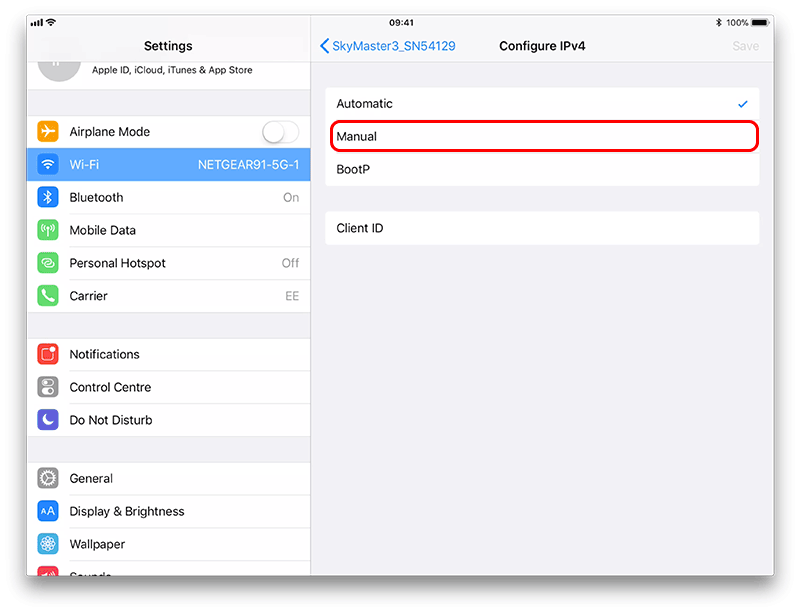
Connection to a SkyMaster meter requires a STATIC IP, so now tap 'Manual' as shown by the red box above, this will then reveal further settings. The meter and iPad will not establish a working connection if the option is left at 'Auto'.
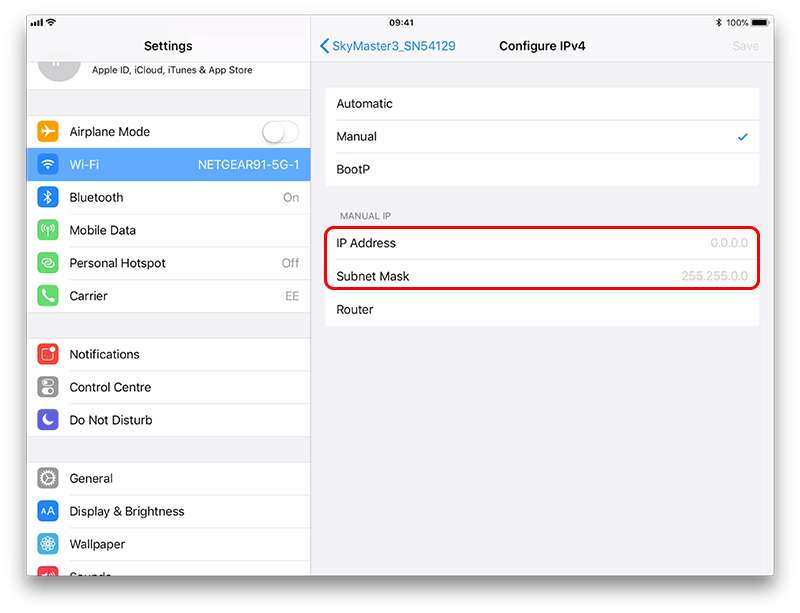
In order to set up a working manual connection you must enter TWO lines of information in the filed identified in the image above by the red box.
| IP Address - this must be set to | 192.168.10.18 |
| Subnet Mask - this must be set to | 255.255.255.0 |
Once you have entered these two sets of values the screen will look like:
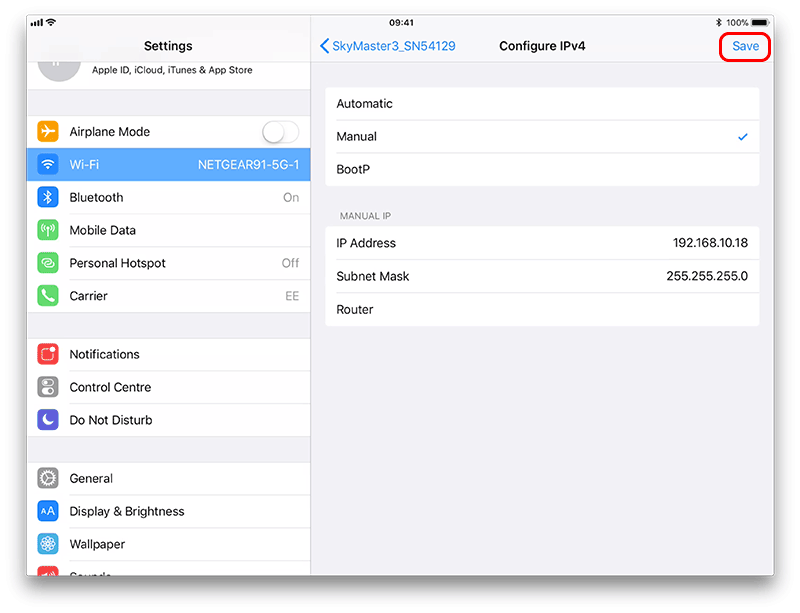
Tap on Save as shown in the red box above to complete the settings and return you to the Wi-Fi page as follows:
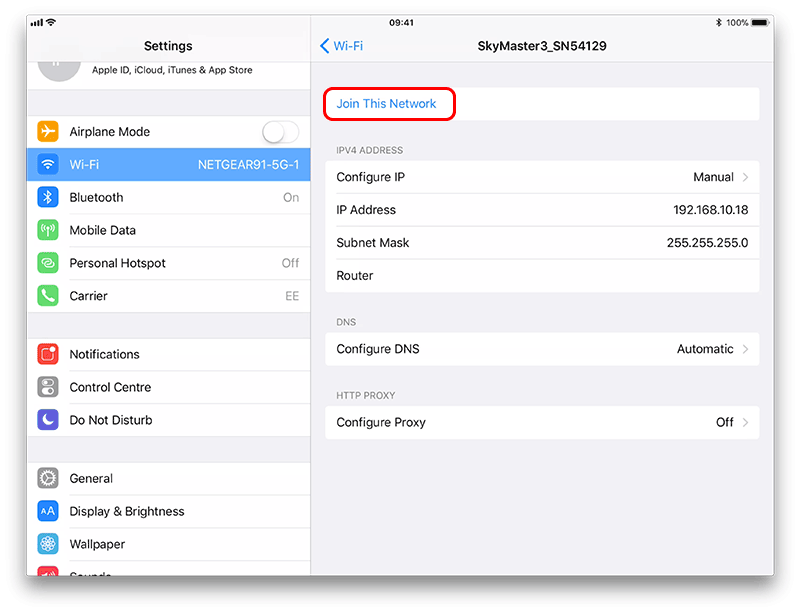
Now just tap on Join This Network to complete the connection set up. When you connect to this network IoS may give you a message s follows.
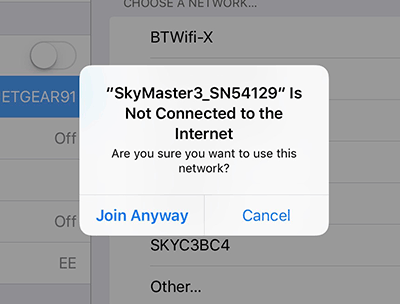
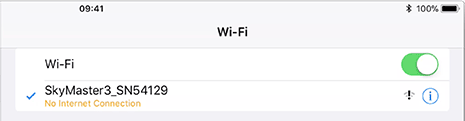
Select Join Anyway - this message is not new and it simply means that your meter is not providing an Internet connection.
 |
 |
Now open your SmartSky application and use the Connect page to complete the connection between the two devices.